We've all seen or maybe even made an I Spy quilt, or some I Spy bags, or even I Spy books.
Here's a new twist on I Spy....

Supplies Needed:
12 different fabric scraps
Pentagon Template
Scissors
Thread
Sewing machine
Polyfil
Needle for hand sewing

Trace pentagon template on the different scraps of fabric. For I spy projects I like to have the template as pictured above where I can see placement of the picture of the fabric piece.

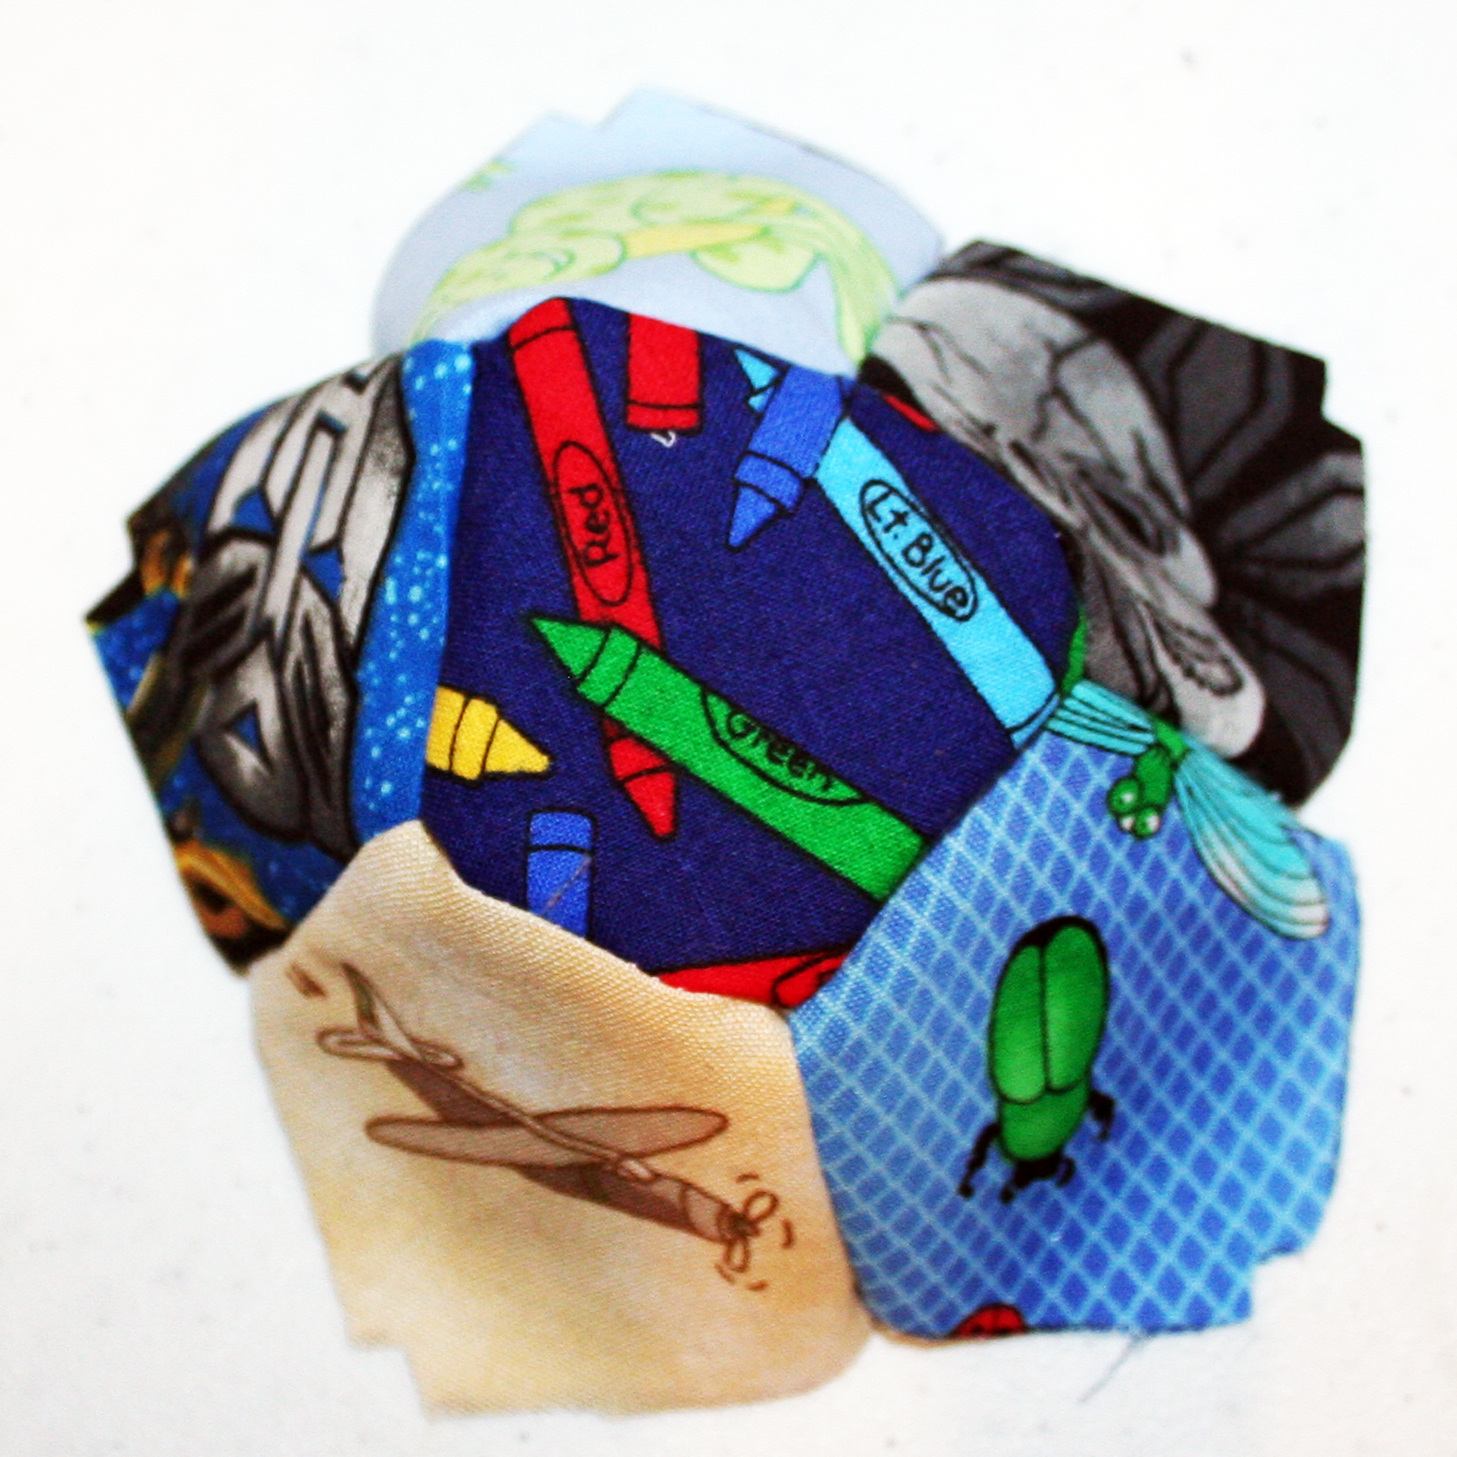
Here are my 12 pieces. All different. All of them things my son likes. Choose one for a center piece.

Take the center piece and grab another piece. Put them right sides together and sew.

Press seams to one side.

Take another piece and put right sides together with the center piece.

Sew and then press seams to one side.

Repeat with 4 more pieces. Here is what it will look like.

Now we need to join all of the outside pieces together. fold so your center piece is folded in half.

Now fold the two pieces at the top point of the center piece right sides together.
(The center piece should still be folded in half. This will prevent folds or bubbling on the ball)


Repeat with remaining pieces.

It will look somewhat like a bowl at this point.
Put this half aside. Repeat with the remaining 6 pieces.

Here are my 2 halves of the ball.

Put them right sides together as in the picture.

Start sewing. I sewed the frog onto the baseballs. Then sewed the Transformer piece to the baseball piece.

Next I sewed the Transformer piece to the monkey piece.

Continue sewing them together leaving an opening to turn.

Turn right side out and stuff with polyfil.

After it is stuffed to your liking whip stitch the opening closed.

Front side.

Back side.
Nancy...you make it look so easy! I think these would make great baby gifts. Thanks for sharing. I'm going to try this soon. :o) Happy Sunday! :o) Larri at Seams Inspired
ReplyDeleteToo funny! I was planning on making an eye spy ball soon for kid gifts. Thanks for making it easier for me!!! Love tutorials!!!
ReplyDeleteThis is ideal for babies & young toddlers who can't quite do the usual I SPy bags. Thanks for linking to Craftastic Monday:)
ReplyDeleteLovely balls!! Thanks for linking this project up too! You're very talented!
ReplyDeleteJill @ Creating my way to Success
http://jembellish.blogspot.com/
This is Genius!!! Thanks so much for the tutorial.. I can;t wait to get started.. in fast I already have some patchwork that is almost the right shape... THis will be great for the school fete.. thanks again..
ReplyDeleteoh my gosh, I love this! I've seen I spy quilts, but this is even better. I was looking for something to make for my nephew's birthday, this is perfect!
ReplyDeleteso cute! This would be fun to make for a nursery too using left over fabric from the bedding! Actually any kid rooms! Very clear tutorial! Thanks for linking up to Topsy Turvy Tuesday's.
ReplyDeleteThis is a fabulous idea! Thanks for linking @Creative Itch's "Sew Cute Tuesday"!
ReplyDeleteI love this ball! I keep collecting scraps to someday do SOMETHING i-spy-ey and this is PERFECT! Especially since my kids are really into throwing balls at each other now! ;-)
ReplyDeleteThanks so much for the idea and the how-to! Your tutorials are always so easy to read and understand! Thanks!
This is awesome! Thanks for sharing!
ReplyDeleteThank you for sharing your info. I really appreciate your efforts and I am waiting for your next post thank you once again.
ReplyDeleteFeel free to surf my web page :: electronic cigarette wholesale