One of my wonderful readers asked me for a tutorial for this headband. I was happy to oblige. It gave me the perfect excuse to make one for myself! LOL.
I call it the Sylvia headband because it reminds me of my Mother-In-Law. This is something she would totally wear. Frilly and feminine, just her style.
Supplies Needed
- Strips of fabric (mine range from 1" to 1.5" wide)
- tulle (the soft kind)
- Headband
- Glue gun
- Glue sticks
- Scissors

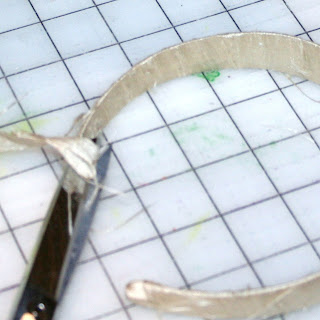
Put a dot of glue on the inside of one end of the headband.
Put the end of a strip of fabric on the dot of glue.
Place a small dot of glue on the front and wrap fabric to cover the glue.
Continue wrapping the fabric around the headband.
Until you get to the other end of the headband.
Put a dot of glue on the inside and fold the fabric over onto the glue.
Cut of the extra.
For The Roses
Tie a knot at the end of a strip of fabric.
Put some glue on the knot.
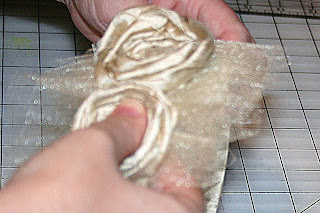
Twist the fabric and push into the glue.

Continue twisting and gluing until you get the desired size rose.
Put some glue on the back of the rose and fold the end of the fabric into the glue.
Repeat making various size flowers.
Embellishing The Headband
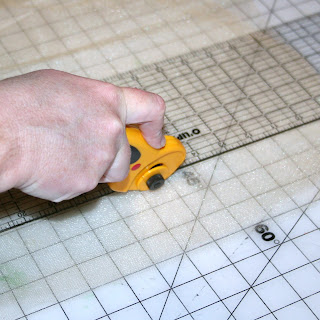
Fold tulle in half and then in half again. Cut it 3" wide.

Put a generous amount of glue on the headband.

Push the strip of tulle into the glue pleating it as you go.

Here's what it will look like.
Put some glue on top of the tulle.
Press flower into glue.
Trim the tulle if needed. I like mine to be a little shorter on the front than the back. I also like mine to be uneven. I don't like the tulle to have a straight looking edge. These are just my personal preferences.
Now you have a pretty new headband.


Adorable. And it looks so cute. I love that it reminds you of your Grandma. That's so sweet.
ReplyDeletehttp://www.holy-craft.blogspot.com
I love it! Thank you so much for the tutorial. I can't wait to make some for the girls :)
ReplyDeleteVery beautiful! I love the color you chose for the headband.
ReplyDeleteI found your post through Sweet Sumo's!
This is so cute!! I love the roses and the tulle. So pretty and feminine. Great tutorial too - so nice and easy to follow!
ReplyDelete~stopping by from It's So Very Cheri! :)
stinkin cute
ReplyDeleteThanks for sharing tutorial. I love the headband. I am always looking for something new to put on my little niece's hair and this headband is so perfect. I'd probably give this a try.
ReplyDeleteSo pretty!!
ReplyDeleteI just saw your puffy skirt on Jill's blog "Tuit" and it was so adorable and had to come here to let you know. Also I'm gratful you've given us all the tutorial for not only the skirt, but this head band which is just lovely too. I gotta follow you now. Great work!
ReplyDeleteMy little girls would love something fancy like this! (from Its So Very Cheri)
ReplyDeleteI admit it- the smile on your model dragged me here. She's just too precious. Great tutorial too, and I haven't seen a glitzy version like this anywhere.
ReplyDelete~stopping by from It's So Very Cheri!
This is beautiful! I would love to make one for myself! :)
ReplyDeleteAmie @ http://kittycatsandairplanes.blogspot.com/
Hi! Wow, that is beautiful! I've always wanted to make this for my girls. Thanks for the tutorial :)
ReplyDeleteHello there! I'm your new follower -- gotta, gotta, gotta follow the woman who came up with this fabulous headband!
ReplyDeleteBig "wave" from further up the coast on Cape Cod,
Jude at
dolcecapecod dot blogspot.com
Oh Thanks Nancy for making a tutorial for the headband its gorgeous :)
ReplyDeleteThanks for linking up to Sew Crafty Saturday
That IS very girly and frilly. Great tutorial.
ReplyDeleteThanks for sharing!! I was going to try to recreate this when I saw it sometime last week, but now it makes it a lot easier that I have the step by step process! Beautiful!! Thanks for sharing!
ReplyDeleteWow! Excellent Tutorial! The pictures are fabulous!
ReplyDeleteThanks for linking up to Making It With Allie linky party!
Allie
AllieMakes.Blogspot.com
Great tutorial! I just love that headband! I definitely don't use my hot glue gun enough - I want to try making this!
ReplyDeleteThanks so much for linking to A Round Tuit!
Hope you have a lovely week
Jill @ Creating my way to Success
http://jembellish.blogspot.com/
Those are adorable!! and I have soooo many granddaughters, these will make great Christmas presents, I think I'll go ahead and make some for Halloween!! Dollar Store, here I come! LOL
ReplyDeleteThat is so pretty. Thanks for sharing.
ReplyDeleteThese are so cool. I bought six headbands and have yet to figure out what to do with them. Now if I could only find them.
ReplyDeleteMy gosh this is so simple, yet so absolutely gorgeous! I must make, have all the supplies in my craft room! Thank you!
ReplyDeleteI`ll do this right now!
ReplyDeleteLOVE IT
ReplyDeletevery lovely..if only I had a granddaughter and make one for her.
ReplyDeleteFantastic tuto!!
ReplyDeleteSo lovely! Thank you for this beautiful little tutorial. Since I have 3 boys and no girls, I would love to make one of these for myself. :)
ReplyDeleteCan I ask, do you know how to attach something like this to a very thin headband? I love the big ones but I am trying to figure out how to make one for my baby girl :)
ReplyDeleteThanks for any advice!
Love your blog and this tutorial! Thanks for sharing!!
ReplyDelete