Well I do. Lots of them!!!
I went to a thrift store the other day and they had a huge bin of clothing $1 for a 13 gallon trash bag. Those of you who read my blog regularly know I love to take a piece of clothing and recreate it. You know I took advantage of this deal!!!! Here's what I made with those jeans.
I have been wanting to make a jeans quilt for a while and this was the perfect opportunity to get enough jeans to make one. I want to get my Christmas sewing done earlier this year (I don't want to be trying to finish 15 on December 23 and 24 this year). This happens to be one of my sons Christmas presents.
Here's how I made the quilt top.
Cut out 90 dark colored and 90 light colored squares. Mine are 6 1/2".
From each pair of jeans I was able to cut out 16 squares.

Next sew 1 light and 1 dark square together on one edge. Repeat with all squares.
Next iron the seams in one direction.
Lay one set of squares on top of the other so that they are opposite each other. light on dark and dark on light (see picture).
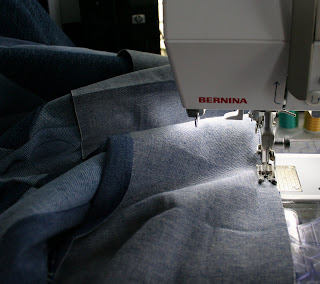
Sew. Repeat with all sets of squares.
Here is what it should look like.

Again iron seams in one direction.

Cut your squares on the diagonal. Cut through the light colored squares. Repeat with all remaining squares.

Lay them on top of each other like this. The dark square lays on top of the light triangle and vice versa.

Sew.
Do the same thing again. This is what it should look like.
Keep doing this until you reach the desired length. Mine is 10 dark squares long.
After I finished a row I cut it as seen in the picture.
You are going to sew this to the begining of the strip as shown above.
This is going to be the strip that starts with a full dark square.
Here is what this strip will look like when it's finished.
You will need 5 strips like this.

For the second strip you will sew the it together with 10 dark squares just like the other one. The difference is you are giong to cut the last dark square in half.

Then sew it to the begining of the strip. This is the strip that starts with half of a dark square.
Here's what this strip will look like.
You will need 4 of these strips

Here they are side by side.
Once again iron all seams one way.

Now you are going to sew the strips together. Alternate strips!!!

Here's what it will look like.
I wanted mine to be a little bit longer so I sew a 8" border on all sides with you guessed it, more denim.
I think bandana fabric would also make a great border.
Iron all seams in one direction.
Lay it out on the floor and admire your awesome work!!!!.
It's easy to put together if you can understand my directions. If not just leave me a comment and I will gladly try to help you out.
Tomorrow I will show you how I did the back!

Linking to these great parties:


.jpg)
.jpg)


What an impressiv work!
ReplyDeleteThat looks amazing! What a good idea to use up all of those jeans... I have so many that I never wear anymore.
ReplyDeleteThis is gorgeous! It looks like it took forever to make, but I bet you just whipped it out! I love it!
ReplyDeleteI've made maybe 6 quilts over the years but none with your perfection.. and the jeans, what a great idea!
ReplyDeleteVery nice!
Sandy
thewondersofdoing@blogspot.com
Way to go girlie!! My momma keeps saying she'll finish our jean quilt. lol
ReplyDeleteThat is lovely! I have got to get started on my Christmas sewing/crafting, too. I'd like to limit the all-nighters as much as possible.
ReplyDeleteWow, that is beautiful. I might just have to keep my old jeans instead of donating them now.
ReplyDeleteThanks for sharing!
Brittany
http://www.prettyhandygirl.com
This is AWESOME!! I love jean quilts!! I especially love the way you did everything on the diagonal! Great tutorial! I am book marking this one for my next jean quilt!! THANKS!
ReplyDeleteWow!! That is definitely one of the prettiest jean quilts I've seen.
ReplyDeleteWow! That is amazing! Aren't you clever!!
ReplyDeleteSuch a great idea to sort the different blues out!
Maggy
I love the design you have created! I will have to show this to my daughter she is starting a jean quilt! Thanks!
ReplyDeleteThat is the cutest jean quilt I've ever seen! Love it!
ReplyDeleteWow! That is such a pretty jean quilt. Thanks for the great idea.
ReplyDeleteThat is turning out so cute! I just recently finished my jeans quilt also. Here it is: http://hipposanddinosaurs.blogspot.com/2010/06/apples-and-sunshine.html
ReplyDeleteThat's the prettiest jean quilt I've ever seen!
ReplyDeleteThis is beautiful and you make it look so easy...I think hubby will be missing a few pairs of jeans in the near future.
ReplyDeleteIt is beautiful and you make it look so easy...it looks like hubby will be missing a few pairs of jeans in the near future...
ReplyDeletewow this is just great thanks
ReplyDeleteI know it has been almost 3 years since you posted the "Got Jeans?" tutorial for this awesome quilt. I have made around 50 denim quilts of all different shapes and sizes but I had not used this method before. I used your tutorial and used white denim in place of the light color, did photo ink imprints of a young lady from birth to graduation on the white squares and cut through the blue demin. She LOVED how it turned out and so did I. Thanks for the idea!!
ReplyDeleteI guess you finished this quilt quite a few years ago. I am wondering if you any trouble with the quilt fraying. i have sewn several denim quilts and such, and did have some difficulty with this on the first quilts and pillows I sewn. So, I have learned, to finish the seams, like I would in garment constructions, Usually I have taken to constructing jeans quilts with a 4 needle Serger. The other option is to zig zag the denim's edges. As long as I do one of these things, I have no problem with fraying, and this holes, in my quilts or pillows. Denim just frays a lot, and you have to do something to stop it.Good luck! Fran
ReplyDelete